How Small Particle Cleaning for Mold Saved My Home: The Pizza Method
This post is about small particle cleaning for mold and how we used the pizza method to make our home safe again after toxic mold.
After finding toxic mold in our home and going through an extensive mold remediation process, we were finally on the last step—small particle cleaning. We had already removed all visible mold, gutted most of the home, and completed remediation.
The crucial final task was clearing out any microscopic mold particles lingering in the air and on surfaces. This process is referred to as “small particle cleaning” and the specific method of small particle cleaning we used is called “the pizza method,” a detailed, systematic approach to small particle cleaning that ultimately saved our home.
In this post, I’ll share our experience, our setbacks, and how we eventually achieved clean, safe air quality levels by using the pizza method. This is also the method I use now to deep clean my house so whether you’re wrapping up a mold remediation and need small particle cleaning for mold or you’re just a clean freak that wants your home as clean and safe as possible, I feel confident to say you’ll get a lot out of this post.
The Importance of Small Particle Cleaning for Mold
Why Small Particle Cleaning is Essential After Mold Remediation
When you’ve finished a mold remediation project, it will likely feel like the job is complete because you’ll be so tired and just want to move on with your life, but airborne particles and spores can and will still remain. These particles can settle on surfaces throughout your home, leading to elevated mold spore counts even after visible mold is removed.
When we had finally finished our remediation and gotten the all-clear from our mold inspectors we knew the final step was to small particle clean and then have an air test run.
We were exhausted from remediating and rebuilding and everything felt and looked clean so we had a group of teen volunteers from our church come over and do the small particle cleaning for us.
There were like 10 kids cleaning the room at a time so it seemed like this would be more than enough to get a clean bill of health on the air test. Although we had plenty of willing hands, the final air quality test results showed we were far from finished.
Our air test downstairs came back with a mold spore count of over 9,000. YIKES. This was obviously not what we wanted to hear and it was discouraging because it felt like cleaning again and again wouldn’t make a difference.
Armed with the knowledge that what we thought was enough detailed cleaning actually was far from adequate we knew we had to take this project into our own hands so we finished round two of small particle cleaning we would know without a shadow of a doubt that every tiny square inch of surface area had been small particle cleaned.
SPOILER ALERT: THE SMALL PARTICLE CLEANING METHOD DESCRIBED BELOW TOOK OUR COUNT FROM OVER 9,000 to THE 200s!
The Pizza Method for Small Particle Cleaning for Mold: A Step-by-Step Guide
The pizza method was the game-changer for us. Inspired by the triangular shape of a slice of pizza, this technique involves cleaning every single surface in the home—top to bottom, inch by inch starting by capturing the big dust particles and ending with capturing the smaller leftover particles. Here’s exactly how we did it:
Step 1: HEPA Vacuum Every Surface and Object
The first step is to use a HEPA vacuum to remove particles from every surface and object in the home. A HEPA vacuum is a must and I want to say that a sealed unit is also a must… You don’t want to vacuum up mold spores only for them to either not get filtered out or to re-circulate because the unit isn’t a closet/sealed unit. This includes:
- Floors, walls, and ceilings
- Furniture, light fixtures, and decorative items
- Small objects like lamps, toys, and even books
- Above door moldings
- Any blinds
- If it is something you can see and touch, it needs to be HEPA vacuumed.
HEPA vacuums are designed to capture microscopic particles, ensuring spores and other allergens are not simply redistributed into the air. Every crevice and corner should be vacuumed. We even ran the vacuum across the tops of doors, window ledges, and within drawers—anywhere dust or particles might settle. I highly recommend a brush attachment and a crevice attachment to get into hard-to-reach places.
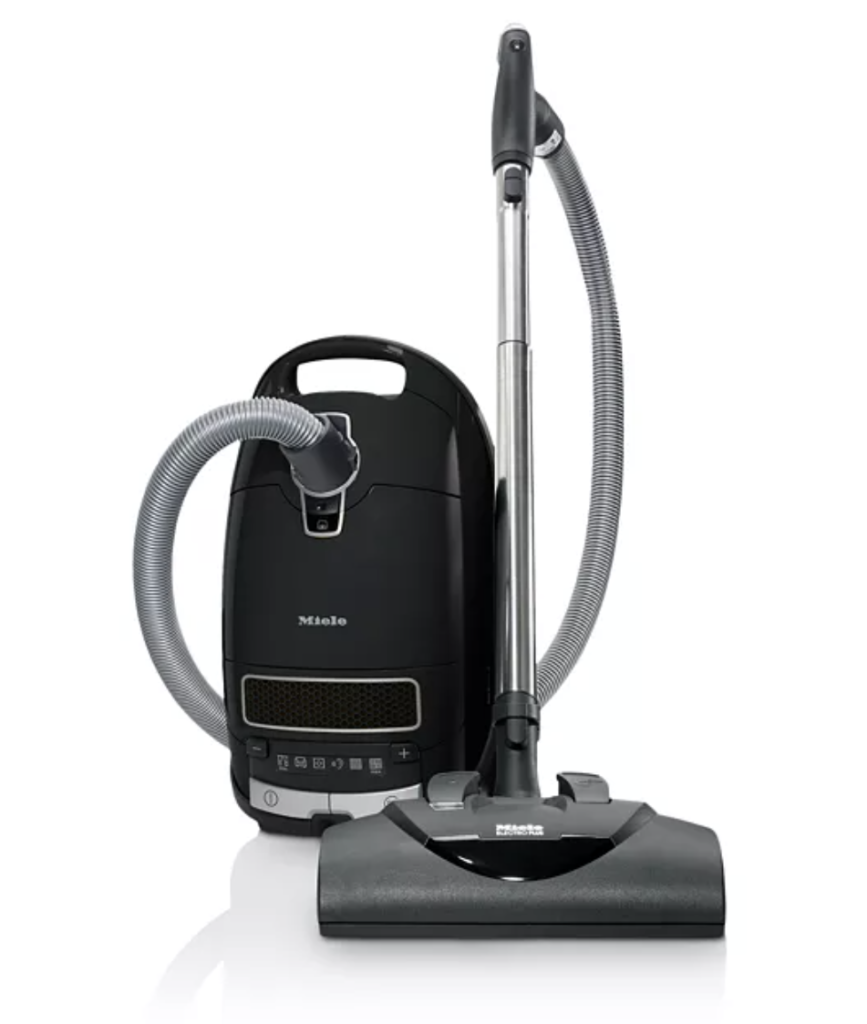
HEPA Vacuums I recommend:
Here are the two different vacuums we use. The miele is my favorite vacuum for regular house cleaning and the back pack unit is my go to for small particle cleaning because I can move more quickly and when I climb a step ladder to reach high places it is MUCH easier and I can more easily do detained cleaning.
My Go To Vacuums For Small Particle Cleaning
Step 2: Damp Wipe with Microfiber Cloths
Next, using microfiber cloths, we wiped down every surface that was vacuumed. This step is critical because it removes any remaining particles the vacuum may have missed. Often, mold spores and bacteria hitchhike onto dust particles. Some of these dust particles are light and easily captured by a vacuum but others adhere to dead skin cells with are made of lipids and like to clink to surfaces. You need dampness and some sort of surfactant to help release the dirt and grime.
Type of Cloth to Use
Any microfiber cloth will do but there are only two types that I recommend (after trying LOTS of brands and types out). The first is a dry Swiffer cloth. These work great but we found out quickly that they are expensive and the knock of brands don’t work as well. The second is a type of micro-fiber cloth called Smart Rags.
Best Microfiber Cloths
I read about these on another mold remediator’s blog and bought some and now I am obsessed and use them for everything. They work SO well and they are cheap enough to throw away if you need but also hold up tremednously through many washings and re-uses.
Here’s how to do it:
- Fold your cloth 3-4 times so you have a small and neat working surface.
- Dampen the surface slightly with a surfectant or non-toxic fungicide for an effective “grab” on any dust or mold spores. Use a spray bottle- 1-2 sprays.
- Wipe down each surface until no visible residue remains.
- Keep flipping and folding the cloth as it gets dirty. When the cloth has no clean sides left, switch to a fresh one to ensure you’re not just moving dust around.
If your cloth comes back dirty on any surface, keep wiping until it’s clean. This might seem tedious, but each wipe removes more spores and allergens from the surface.
Type of Spray Cleaner to Use
NEVER EVER EVER use bleach or anything that’s toxic to clean mold. For small particle cleaning you either want to use a simple surfectant like dish soap and water or you can use a non-toxic fungicide. The only multi-purpose cleaner I use is Branch Basics and the only fungicides I would use are Benefect or Shockwave. I prefer Benefect as it’s plant based (contains thymol, an active compound from the plant thyme).
Best Spray Cleaner for Small Particle Cleaning for Mold
Step 3: Dry Wipe with a Clean Microfiber Cloth
The final step is to go over each surface with a DRY microfiber cloth. This has two main benefits:
- It helps dry the surface so new dust or spores won’t stick to it as easily.
- It collects any last traces of particles that might have been missed.
Dry wiping rounds off the cleaning process and leaves the surfaces fully dry and free from potential mold cling.
Our Results: Clean Air and Peace of Mind
The Impact of Small Particle Cleaning for Mold on Our Air Quality
After completing the pizza method, we had our air quality tested once again. The results were astounding—the spore count, once over 9,000, dropped to 200 something. For reference, anything under 500 is considered VERY VERY good. I will never forget the moment the remediators called and told us. I started crying and then they started crying! This was the conclusion to a 19 month journey and with these results and their OK, we could finally and safely move back inside our home.
How I Still Use Small Particle Cleaning for Mold Today
Although our mold nightmare is finally over the truth is that each of us will be combating mold, toxins, dust, and other allergens in our home for the rest of our lives and small particle cleaning from time to time is a must.
Tips for Making Small Particle Cleaning Part of Your Normal Routine
- Replace “Small Particle Clean” with “Deep Clean” or “Spring Cleaning” to make the thought less overwhelming. The truth is, this is a form of deep cleaning, it’s just a MUCH more effective form of deep cleaning but it shouldn’t be overwhelming.
- Aim to small particle clean each room of the house one to three times a year (or more). I have a big house and a big family so it’s not realistic for me to be able to small particle clean each room more than a few times a year but from experience, if you do it really well and follow the pizza method you shouldn’t have too much build up from year to year.
- Start by choosing a room or portion of a room and clearing away everything from the space you will be working.
- Next, follow the pizza method of small particle cleaning for mold on all the surfaces in that area.
- After that, throw away or give away any items that were in that space that you no longer want or need- this makes your space less cluttered and saves a lot of time when cleaning.
- Lastly, as you move each piece of furniture or thing back to it’s space, small particle clean that item! Yikes.. you probably weren’t expecting that. Yes, you need to follow the same procedure on all of your things.
More Notes on Small Particle Cleaning for Mold on Furniture and Items
When you are remediating for mold you have to not only clean your walls and floors and ceiling and molding and permanent fixtures but also all of your stuff. This is where the Marie Kondo method came to a whole other level for me. Having to small particle clean every piece of furniture, every book, every container, every THING took so long and so it made me really evaluate what I wanted to keep and not keep.
Tips for small particle cleaning your stuff:
- Use q-tips and brushes to get out the grime and dirt in the furniture crevices. Take out drawers and flip furniture upside down to really clean it well.
- For books and paper- trash it if it’s been exposed to mold and if not, just dry wipe it.
- If your cloth comes back dirty then that means you’ve still got work to do.
- The more careful you are this time, the cleaner it will be next time.
- Try to organize into bins that are easy to wipe off and have lids, this way, you have a lot less to clean because your things in the bin are protected from settling dust. This also helps you move things around more quickly.
Final Thoughts: Tips for Small Particle Cleaning Success
Here are a few tips if you’re planning on using the pizza method:
- Invest in Quality Microfiber Cloths: Microfiber is key for effective particle capture, so stock up on good-quality ones. I might make enemies with this statement but I’ve tried a LOT of micro-fiber cloths, including expensive Norwex cloths and I would choose the inexpensive Smart Rags every time.
- Replace Cloths Frequently: When they’re visibly dirty, fold them a new way and then swap them out rather than reusing them. Fresh cloths ensure you’re actually removing particles, not spreading them around. Again, this is why I love Smart Rags.
- Have Patience: This method is detailed and time-consuming but worth every effort for the health and safety of your home.
- Temper Your Expectations: Clean room by room or section by section so you don’t bite of more than you can chew. This takes a lot of time but if you do it correctly it will make a huge difference.
When you try this small particle cleaning for mold method I would love if you head over to my Instagram or TikTok and tell me how it went.


